In the last three year, two of the most hyped buzzwords in the A space are, among other, Agents and Multimodal. Building AI applications that can “see” and understand images while providing intelligent analysis has been widely adopted in various applications.
Multimodal AI enables models to understand and process multiple types of input simultaneously, including text, images, audio, and more. In this guide, we’ll explore how to build a real-time Multimodal Agent using Agno, an open-source Full-stack Agent framework, combined with Azure OpenAI’s vision models, along with a UI using Gradio.
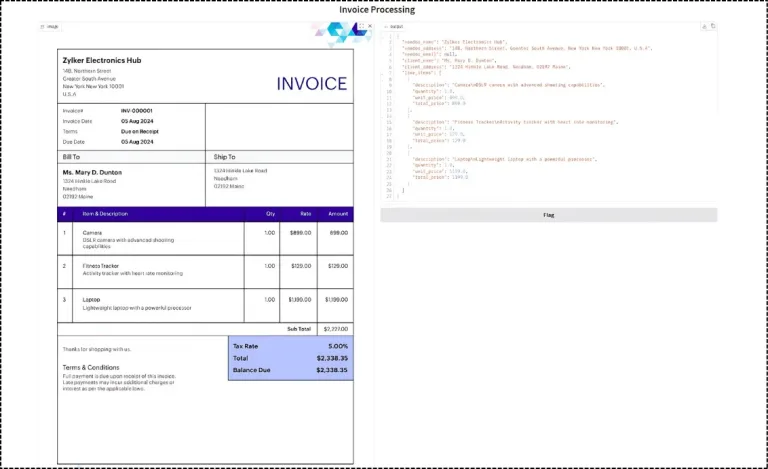
Let’s build an Invoice processing system using the Multimodal Agent.
Learning Objective
- Understand what multimodal AI means and why it matters for modern applications
- Identify real-world use cases where multimodal Agents provide significant value over traditional approaches
- Set up and deploy Azure OpenAI models for building LLM-powered apps.
- Build and configure a multimodal Agent using the Agno by implementing both URL-based and file-based image processing workflows
- Bonus: In this article, we will also implement how to get the structured response from Agent and build a Gradio UI for the Agent interface.
- Create domain-specific system prompts that guide AI behavior for specialized tasks
What is Multimodal?
Multimodal AI processes multiple data types at once: text, images, audio, video, and sensor data. Instead of being limited to text conversations, these systems can see and understand visual information while responding in natural language.
The initial traditional models only work with text, but now all the new model ones, like GPT-4.1, Gemini 2.5 Pro, Claude, and even all the open-source models, can handle both text and images simultaneously. The building of real-world problems rarely comes in just one format, with Multimodals, the use cases implementation has also grown in numbers.
For instance, consider our use case, i.e., analyzing an invoice. Multimodal systems don’t just detect that it’s a document. They read the actual text, understand table structures, identify vendor logos, and extract specific data points all in one go. This combined processing creates a much richer analysis than any single-input approach could achieve.
Why Is There a Need for a Multimodal Agent in Finance?
Traditional AI hits a wall when financial data is locked inside visuals. Think of scanned invoices. Text-only models can’t extract vendor names, amounts, or line items. You’d end up transcribing everything manually, which is impossible to scale when thousands of documents are involved.
Multimodal Agents solve this by connecting visual and text understanding. They can read invoices, understand the layout, and pull key details instantly. This becomes crucial for automating accounts payable, tracking expenses, or handling audits where visual context matters.
Frameworks like Agno, LangGraph make this easier. They offer model-agnostic support across text, image, audio, and video without slowing things down. Developers can skip the complex setup and focus on solving the actual business problem.
What Are the Top Use Cases for Multimodal Agents?
Form filling in Finance/Banking becomes simple. Just take a screenshot of a complex form, and the Agent pulls out all the details. No manual entry. It even reads handwritten notes and printed documents, cutting down hours of work to just minutes with fewer mistakes.
In Education, students can upload images of diagrams, equations, or textbook questions. The Agent breaks it down with clear explanations. Learning feels more interactive and suits different styles.
In Retail, customers can click a photo of a food label or cosmetic pack. The Agent gives a full breakdown of ingredients, highlights allergens, and explains the health impact. It’s quick and useful for everyday choices.
While Travelling, take a picture of a local dish or a street sign. The Agent tells you what it is, what it means, and the story behind it. Exploring a new place feels more real and informed.
What Is Azure OpenAI and How Does It Help Deploy Models?
Azure OpenAI (Foundry Models) lets you run OpenAI’s models on Microsoft’s cloud infrastructure instead of using the public API. This gives you more control, better compliance, and dedicated resources for your applications.
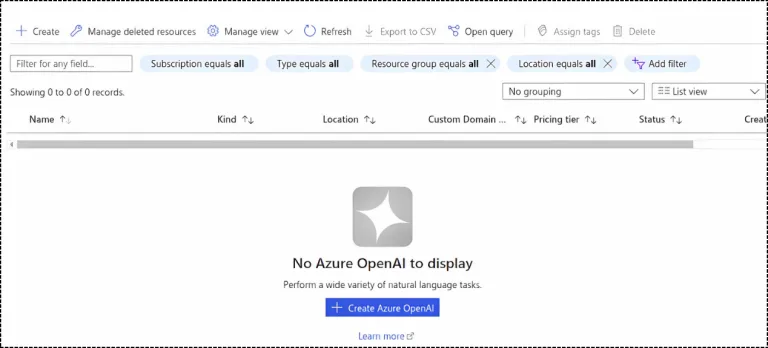
Create a new resource group on Azure ChatOpenAI
- To set up Azure OpenAI, first go to the Azure portal and search for Azure OpenAI Service. Select it and choose Create Azure OpenAI.
- From there, you’ll create a deployment for the model you want to use.
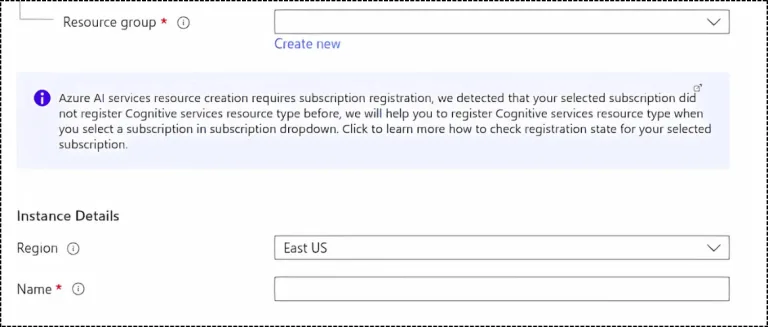
- Once you click on Create, add your resource group or make a new one. Give your project a name and pick a region like EastUS for deploying the model.
- Model availability depends on location, so check which ones are supported in your selected region.
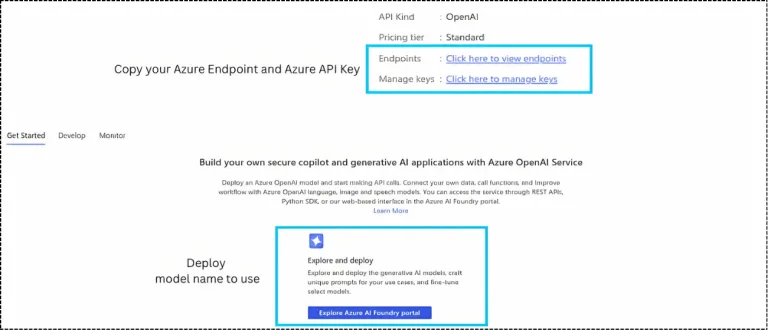
Click Next and create the resource group. After it’s created, you’ll be taken to the dashboard where you’ll see options like Endpoints and Manage Keys (Figure 3).
How Do You Deploy a Model in Azure OpenAI?
In terms of development, if you need to use Azure OpenAI, you need:
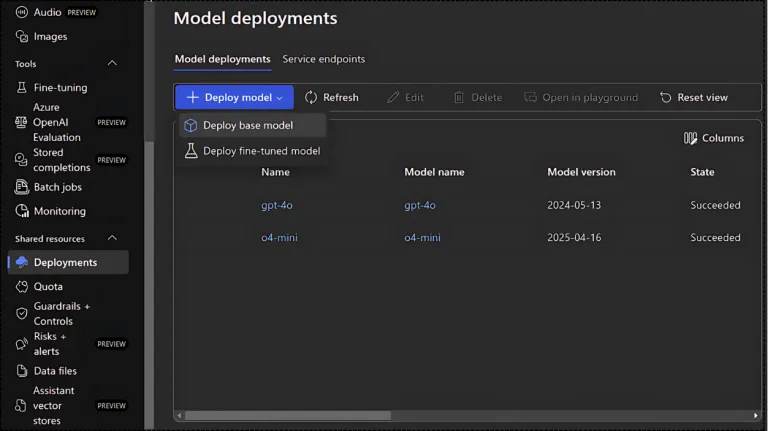
Copy the endpoint and API key and save them somewhere safe. Then, click on the Explore Azure AI Foundry portal to choose and deploy a model from the supported list. On the Foundry portal sidebar, you’ll see Shared Resources. Click on it and select Deployments.
Once the model deployments are visible, the next step is to deploy a base model like GPT-4.1, GPT-4o, o3-mini, o4-mini, o3, o4, and so on. Choose a model that fits your budget and the requirements of your use case. For this setup, I’m selecting o4-mini.
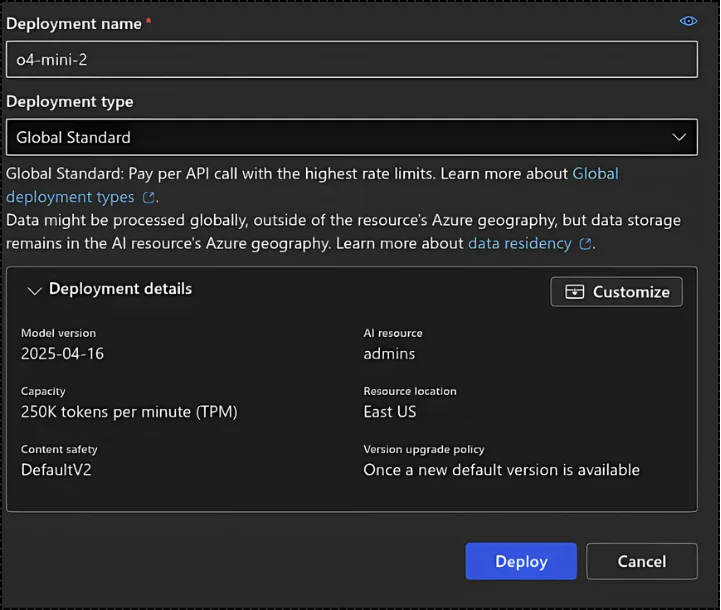
That’s it. Once you select the model, a window shows the configuration details like requests per minute, deployment type, and other settings. Just stick with the defaults and click Deploy.
The model name becomes the deployment name, which is important later in the code. You can rename it if needed (before deploying).
Now we have Azure endpoint, API key, and the model deployment name, it’s time to build the Invoice processing Multimodal Agent using Azure OpenAI and Agno.
End-to-End Invoice processing Agent using Agno, AzureOpenAI, and Gradio
Getting started with Agno is straightforward since it’s designed to be lightweight and dependency-minimal. The installation process takes seconds and doesn’t require complex configuration files or environment setup.
Step 1: Installation
For building the Agent and handling structured responses, install Agno. Azure OpenAI needs the openai library, but Agno already supports it, so there’s nothing extra to install. For the UI, we’ll use Gradio.
Step 2: Define the LLM model- Azure OpenAI
Connecting to Azure OpenAI requires three key pieces: your API key, endpoint, and deployment name, which we already created.
Set these as environment variables to keep credentials secure and easily configurable across different environments.
The AzureOpenAI class handles all the authentication and communication protocols behind the scenes. Once initialized, this model instance becomes the brain of your Multimodal Agent, capable of processing both text and images.
Step 3: Initialize System Prompt and Instructions
Writing effective prompts is crucial for specialized tasks like invoice processing. The system prompt defines your Agent’s personality or roleplay and expertise, while instructions provide specific guidelines for consistent outputs.
Be specific about what to extract from the invoice. Mention fields like invoice number, date, vendor name, line items, total amount, and tax. Use formats like XML, JSON, HTML, or Markdown in the prompt. It helps keep the output clean and consistent.
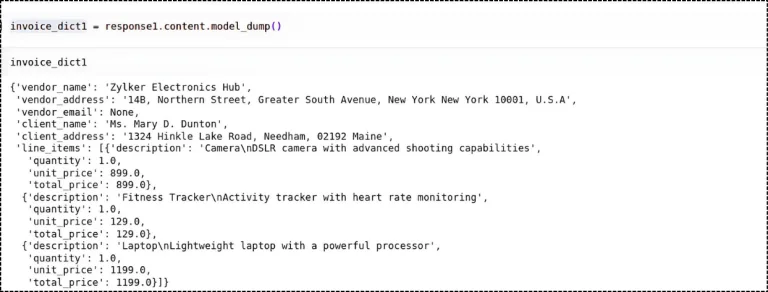
Step 4: Get a Structured Response from Agents
One common challenge with LLMs or agents is keeping the output consistently in JSON. Sometimes the response includes extra tokens, making it hard to parse.
To fix this, use Pydantic BaseModel. It’s a simple Python library where you define the JSON keys you need, like unit price, quantity, email, and their descriptions. Add this to the agent or LLM, and it helps generate clean, structured JSON every time.
Here, InvoiceData is the class that we need to provide to the Agent, which will extract the Vendor name, Vendor address, Email, Client name, and address.
Step 5: Define the Agent for processing Invoices
Creating the agent combines your model, prompts, and configuration into a single working system. The Agent class orchestrates everything—from processing images to generating structured responses based on your specifications.
Make sure to enable use_json_model = True, so that Agent knows to generate the response in JSON. If you need markdown, then just use markdown=True.
Step 6: Execute the Multimodal Agent using the Image URL
Testing with URL-based images allows quick prototyping and integration with web-based workflows. The agent fetches the invoice image, processes it through the vision model, and applies your financial document analysis expertise automatically. The URL needs to end with JPEG or JPG or WEBP, or PNG.
Step 7: Execute the Multimodal Agent using the Image File path
Local file processing is used when invoices are uploaded to your app or stored on the system. The agent reads the file directly and gives the same level of analysis as it would for an image from a URL.
NOTE: Just make sure the image file path is correct. In my case, the app file and the image are in the same folder.
The Agent is working well and giving the results. Now, instead of attaching the file path and URL for each input, let’s build a UI using Gradio where the user can directly upload the image and check the extracted invoice information.
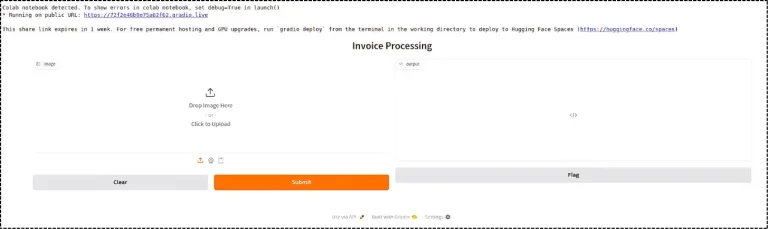
Step 8: Gradio Chatbot- Build and Share the UI
Gradio lets you build web interfaces for machine learning models with just a few lines of code, turning any Python function into an interactive web app instantly.
Gradio has widgets like text, button, chatbot, and file upload. Use what you need based on the use case. Each widget needs a function. Here, we define process_invoice, which takes the image, sends it to the Agent run, and returns the response. This is no new code; we already covered this in Step 7.
Define the widget you need. Here, we use an Image as input so the user can upload the invoice. The output is Code to display the JSON response properly. For the logic, we define process_invoice as a function.
Now the user just needs to upload the invoice image and check the output.
Final Words
Building multimodal agents with Agno and Azure OpenAI shows how AI can handle real business problems like invoice processing without complex integrations. The same pattern works for any document type by adjusting prompts and data models. Make sure to define a specific System prompt and instructions.